Add Printer via Network Scan (Draft)
Step 1. Open the Add Printer dialog
Dashboard
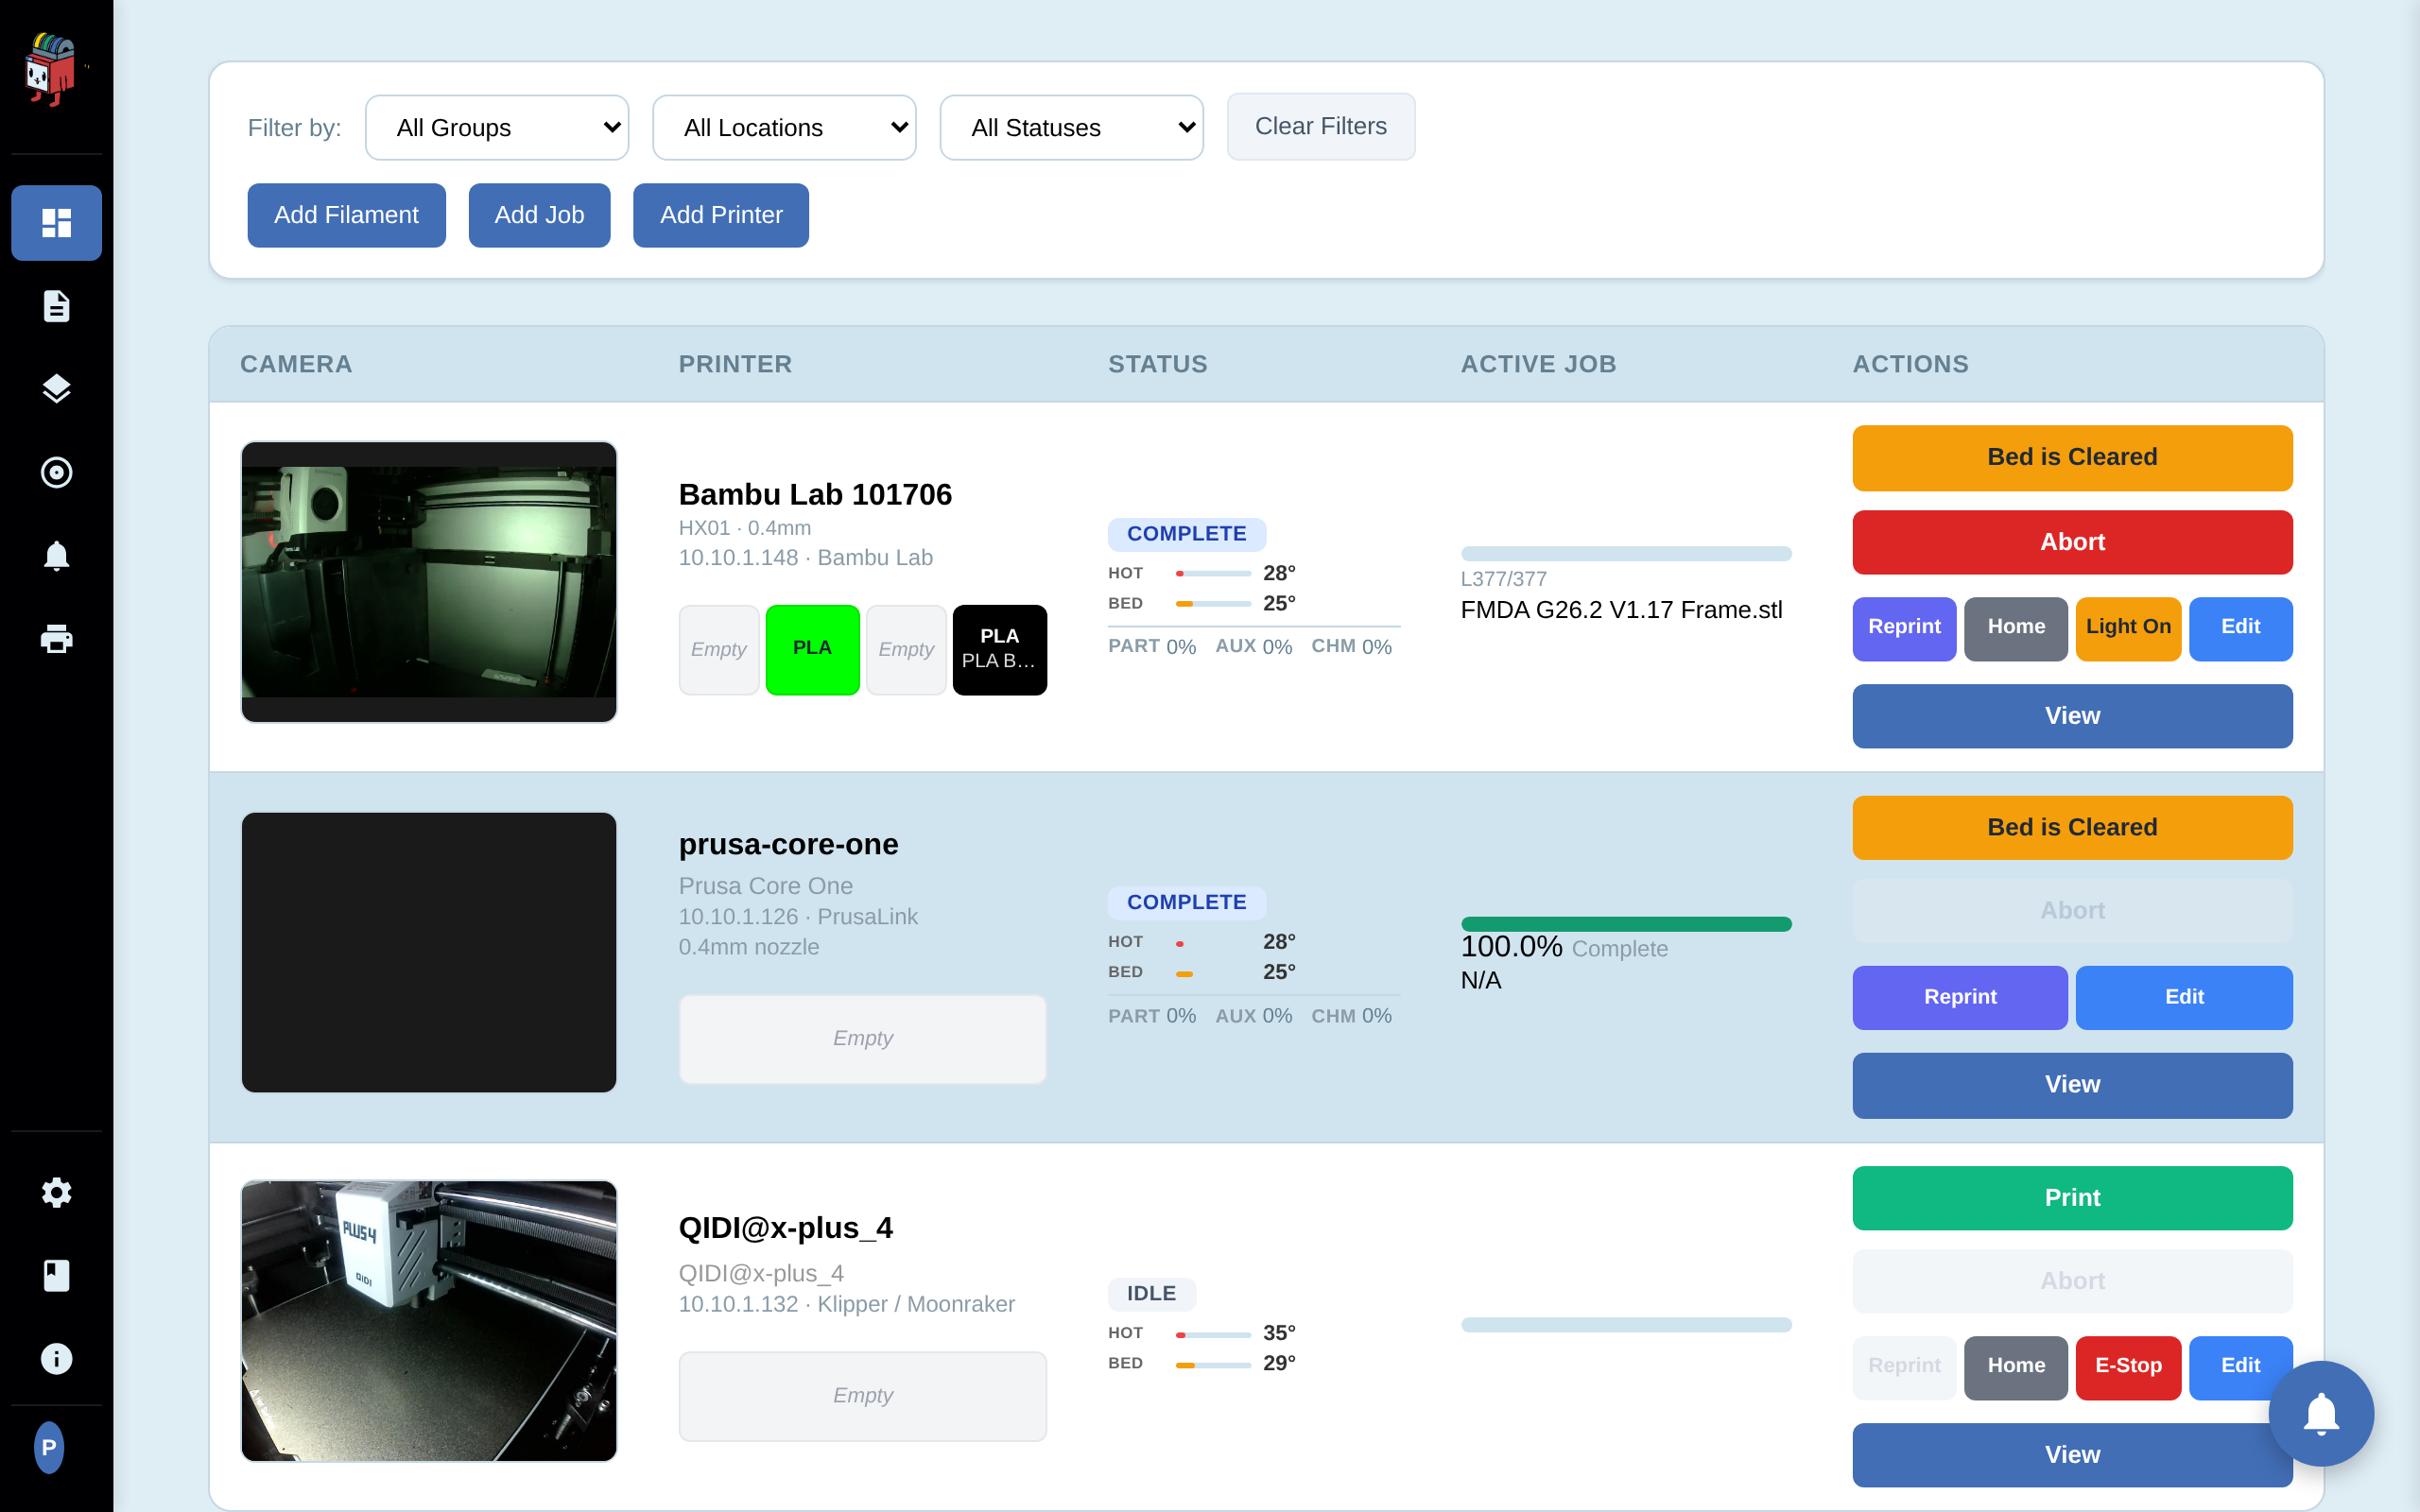
On the dashboard, click Add Printer. The Add Printer dialog opens with three tabs across the top: Network Scan, IP Scan, and Manual Entry. The Network Scan tab is active by default.

Step 2. Run a network scan
Network Scan Tab
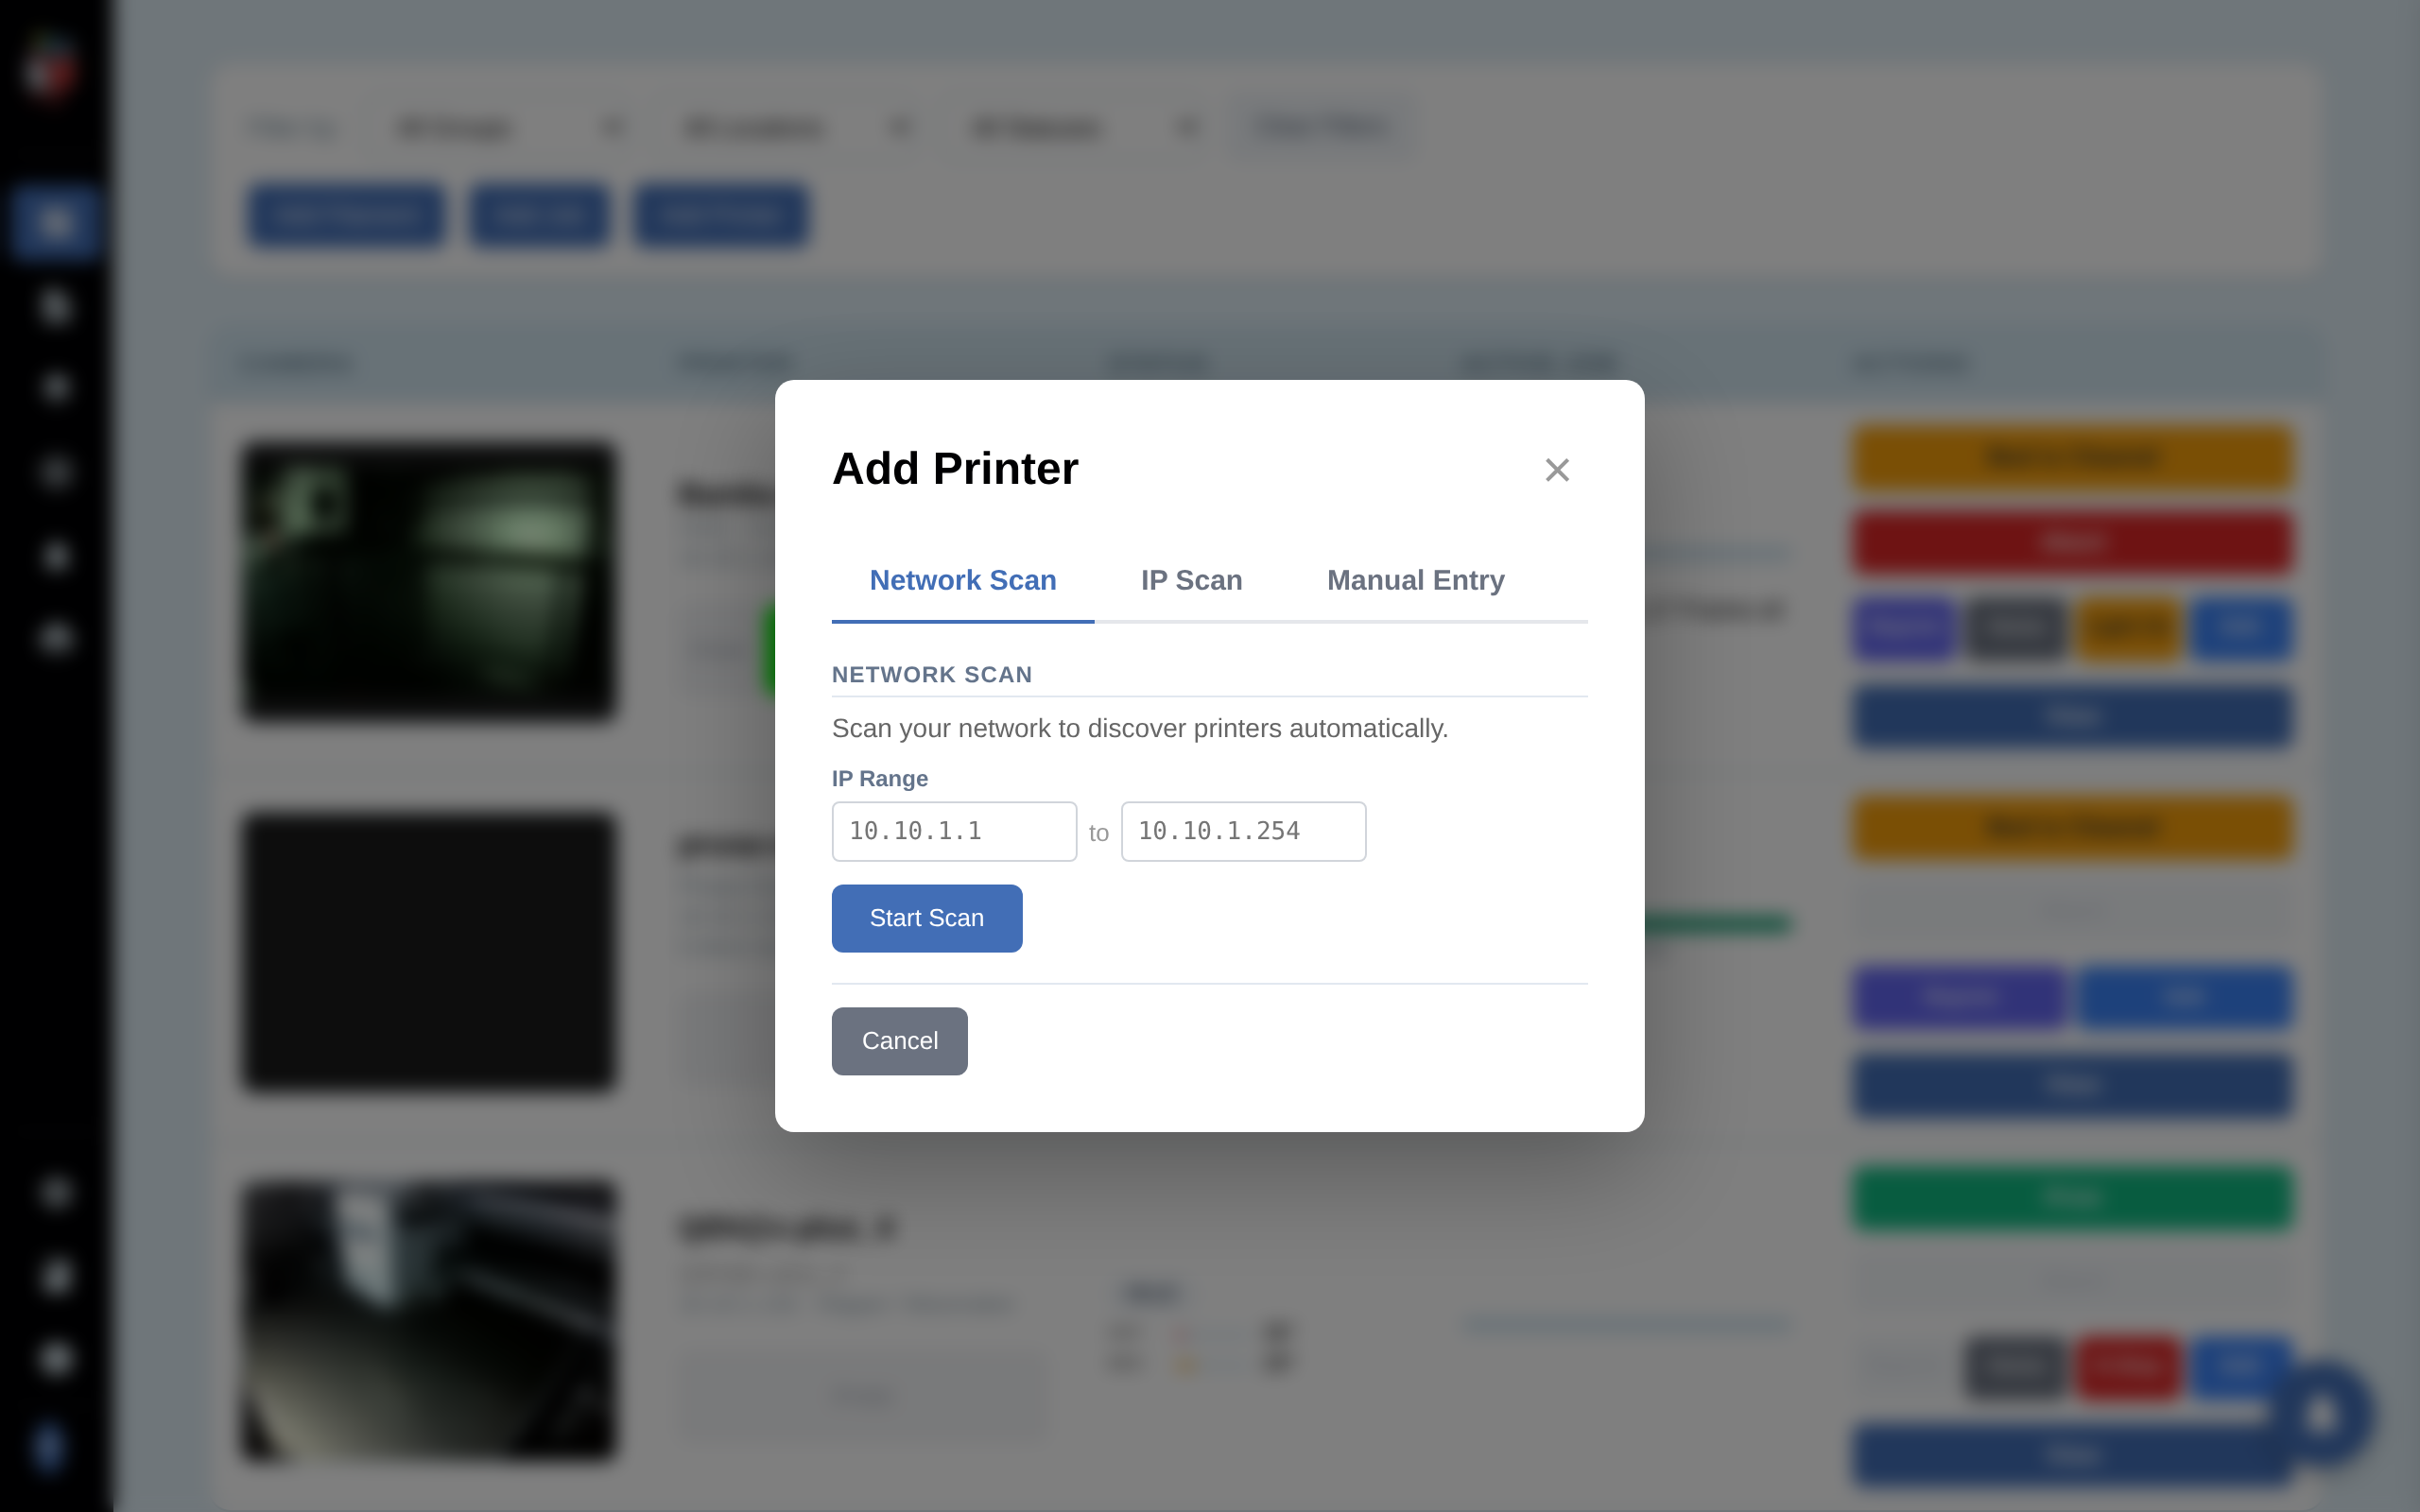
The IP Range is pre-filled from your node's subnet (e.g. 10.10.1.1 to 10.10.1.254). Adjust either end to widen or narrow the scan, then click Start Scan.
The scan runs in four phases:
- Connectivity sweep across the full range to find live hosts.
- Filtering pass that excludes hosts whose OS or open-port profile is obviously not a printer.
- Probe remaining hosts on common printer-control ports.
- Identification of firmware, manufacturer, and model from the responses.
A /24 scan typically takes 2 to 4 minutes. You can click Cancel Scan at any time. Progress and a per-host status line update live while the scan runs.
Step 3. Select the printers to add
Discovered Devices
When the scan completes, the Discovered Devices panel lists every live host detected as a printer. Auto-detection fills in firmware, manufacturer, and model when it can. Printers already in PrinterMon are flagged Already exists and disabled.
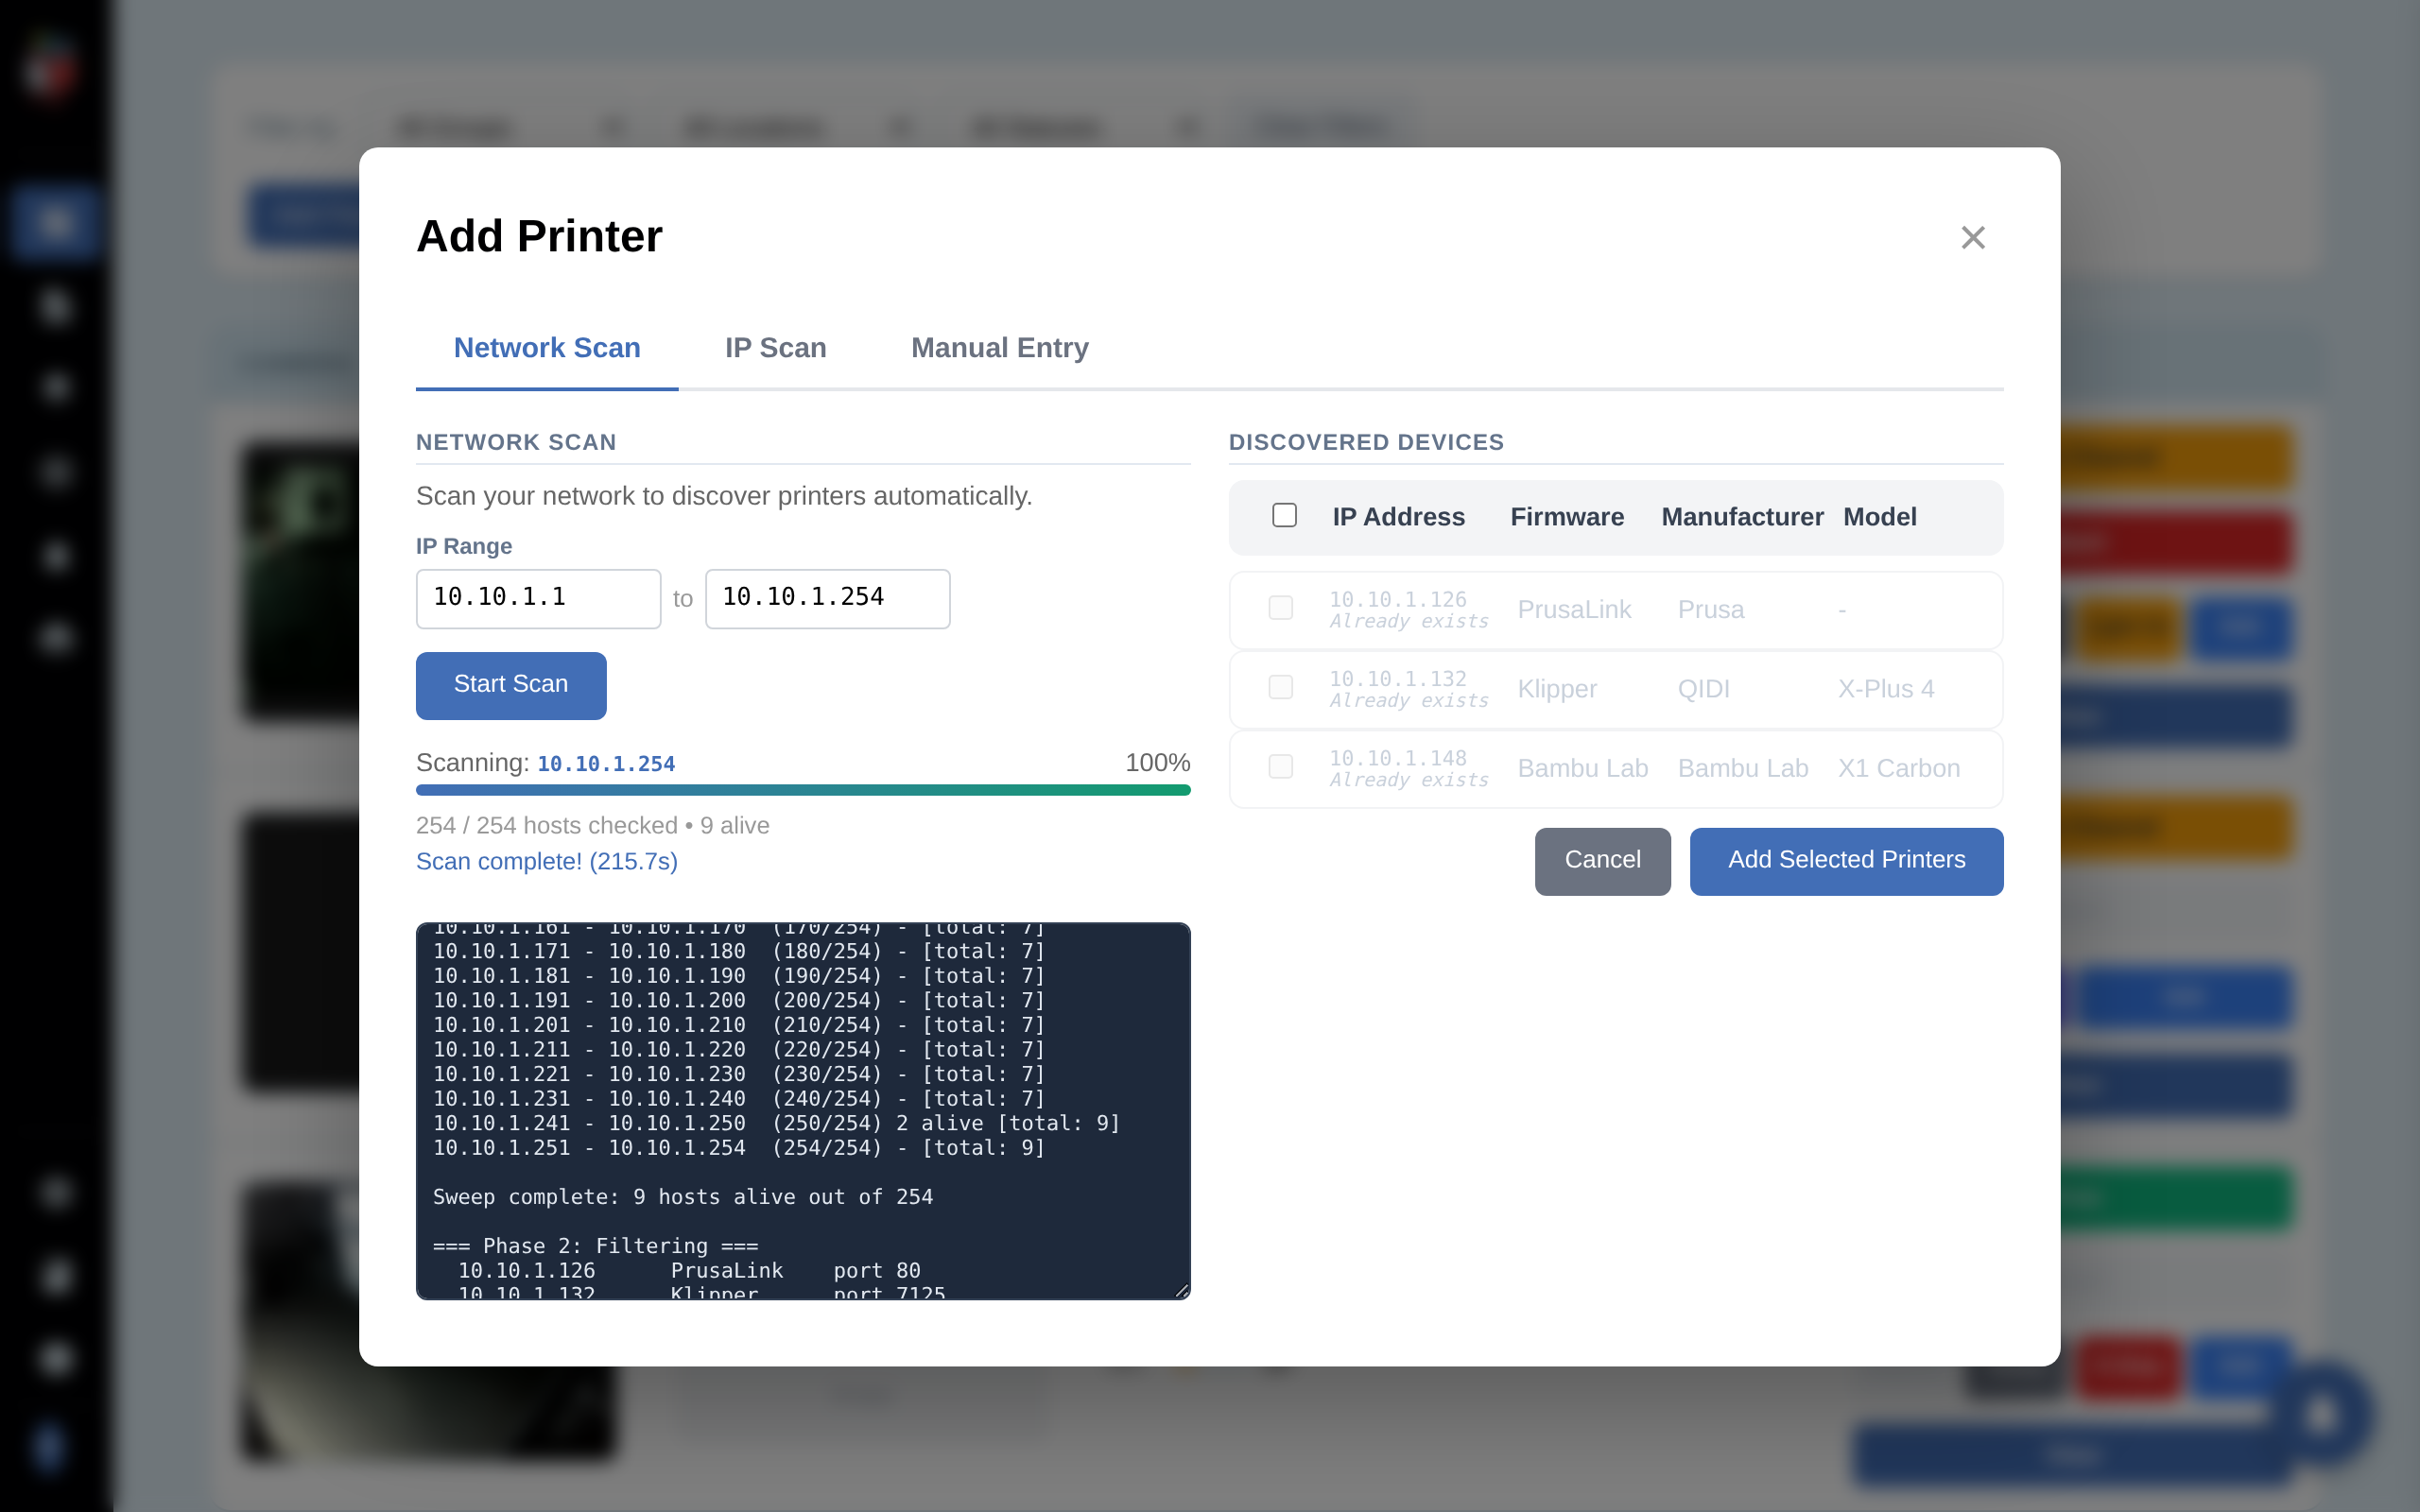
Check the boxes for each printer you want to add, then click Add Selected Printers. A confirmation form opens for the first selected printer.
Step 4. Confirm details for each printer
Confirmation Form
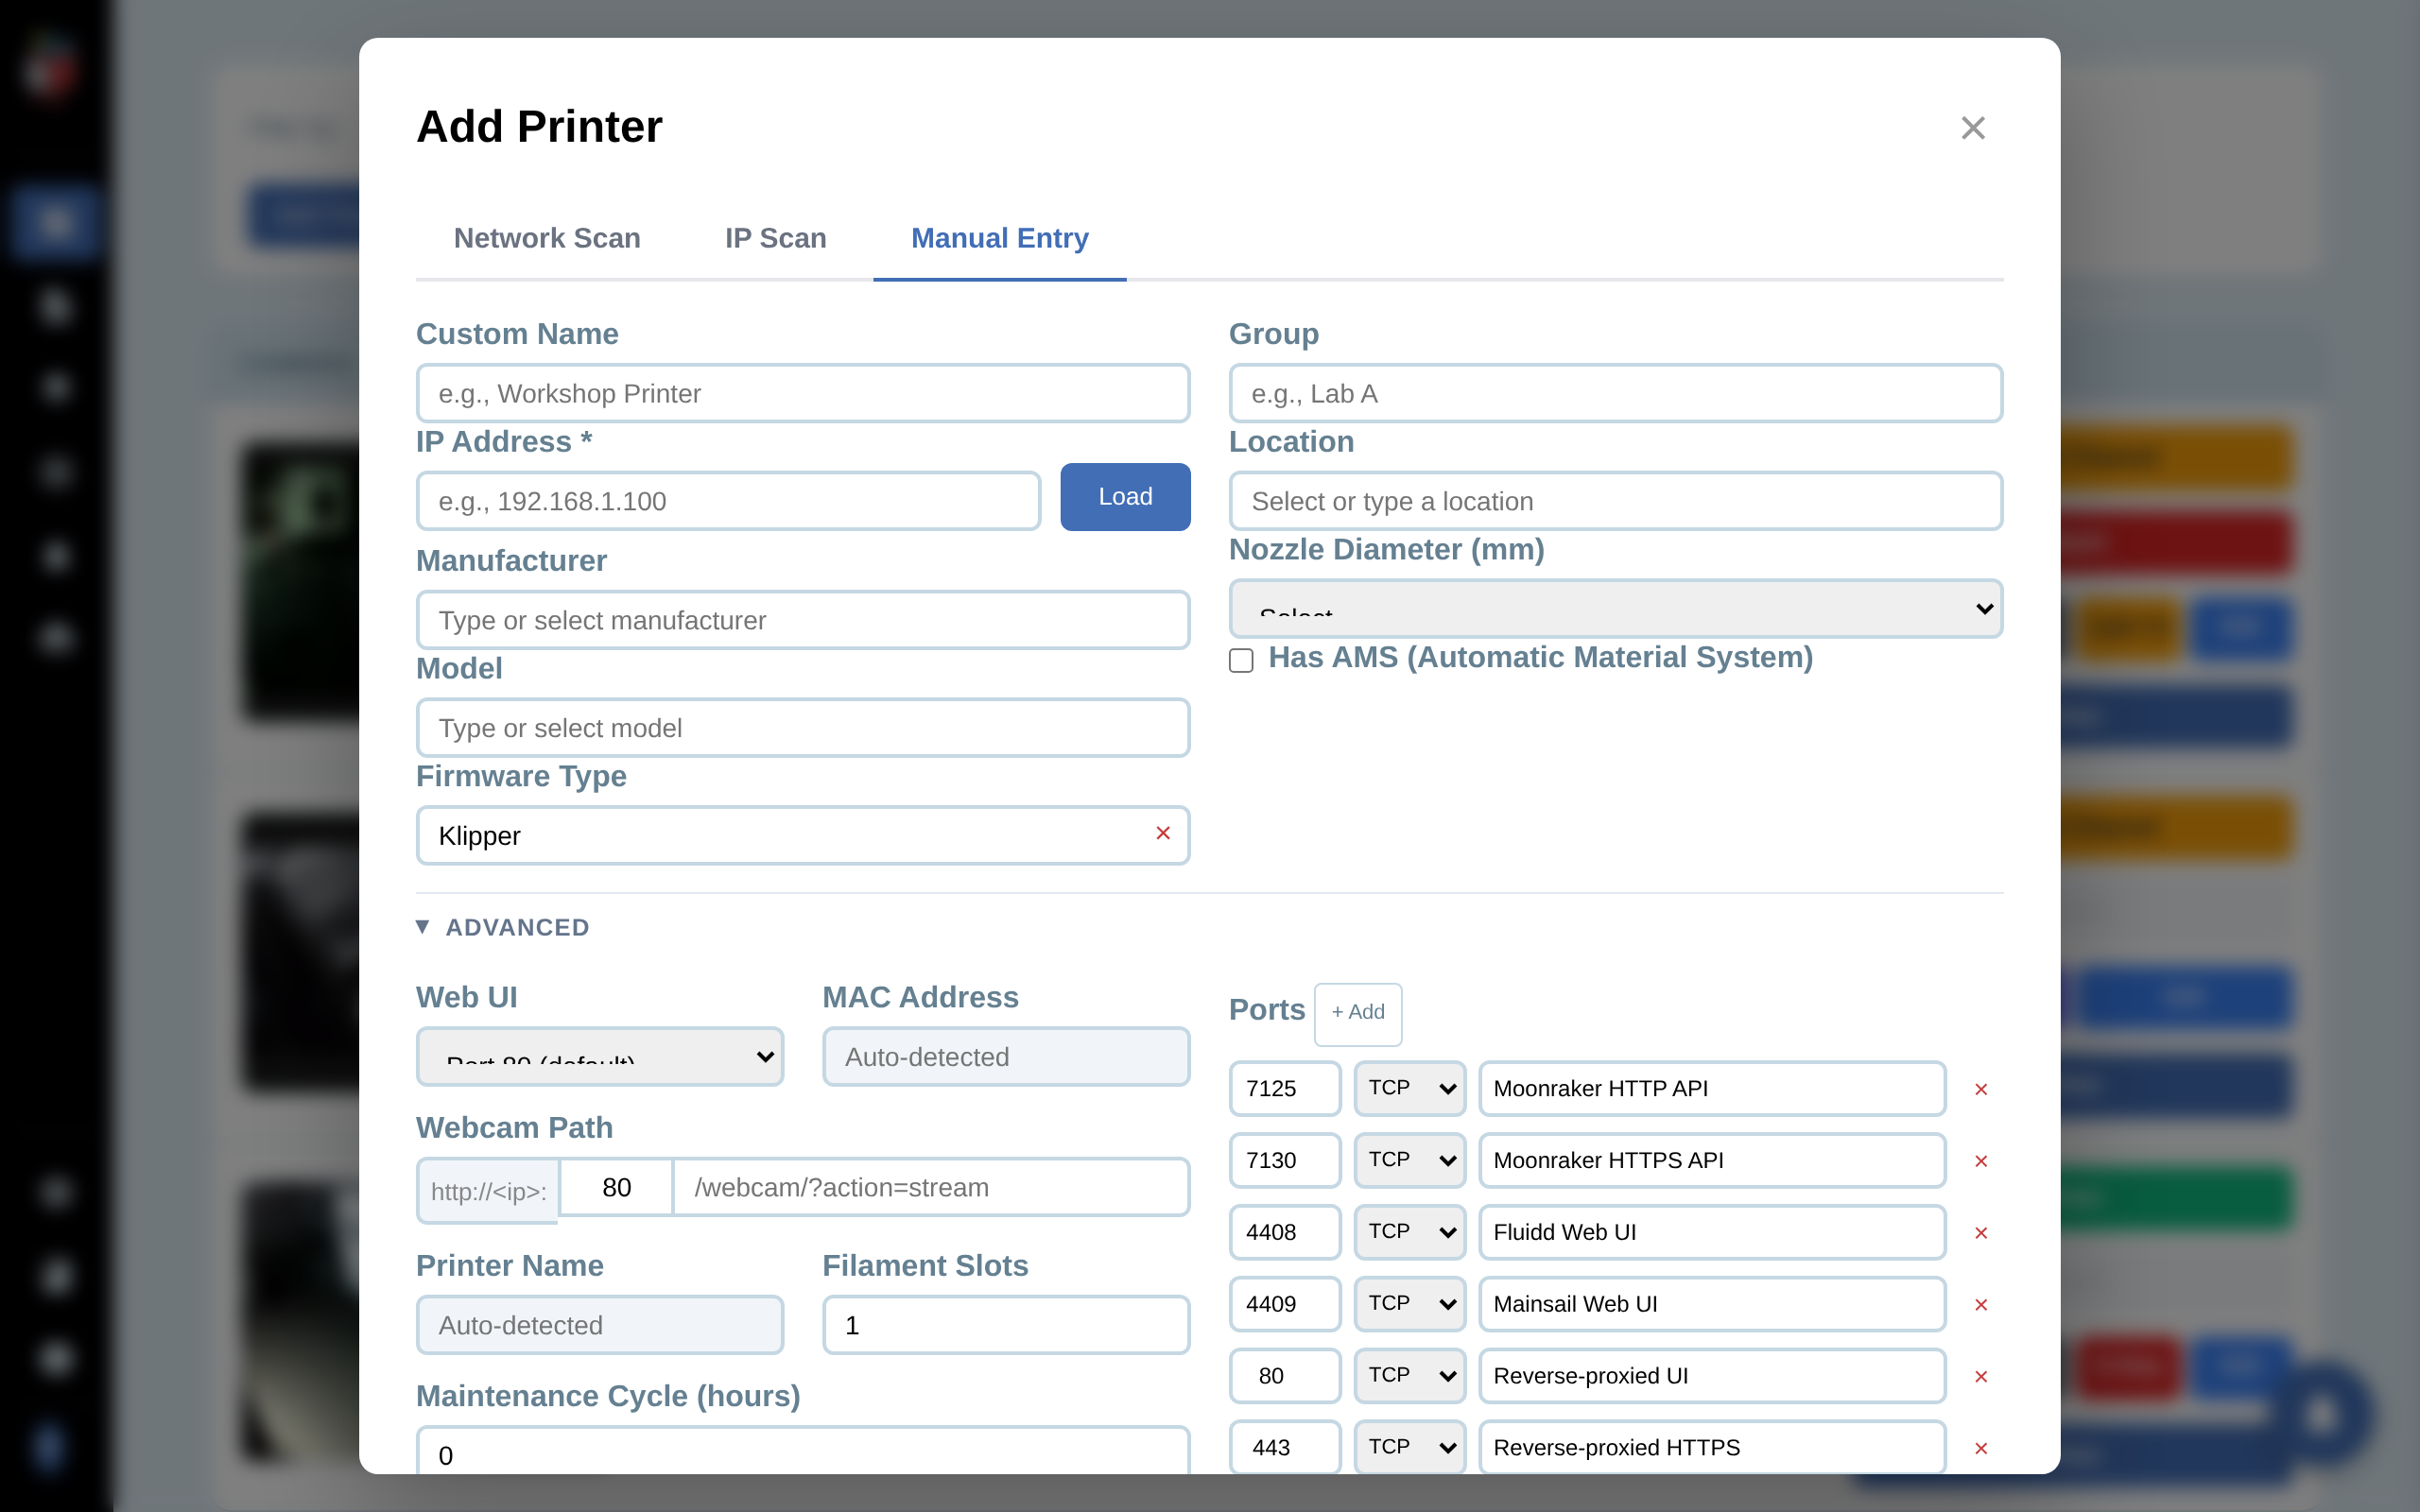
A confirmation form opens for each selected printer with the auto-detected values pre-filled. Edit anything you want to override.
Main fields:
- Custom Name. Display name in the dashboard.
- IP Address and Firmware Type. Pre-filled from the scan. Editable if the auto-detect was wrong.
- Manufacturer / Model. Searchable dropdowns. Required for firmware-specific features (filament profiles, status mapping, light control).
- Group and Location. Optional text tags for filtering the dashboard.
- Nozzle Diameter. 0.2, 0.4 (default), 0.6, 0.8, or 1.0 mm. Used for slicer profile matching.
- Has AMS. Check for Bambu Lab printers with an Automatic Material System attached.
The credential field that appears below the main fields depends on the firmware you select:
- Bambu Lab. Shows Access Code. This is the 8-digit LAN code printed on the printer's display under Settings > Network > LAN Mode.
- PrusaLink (Prusa Buddy). Shows Password (the PrusaLink password set in the printer's web UI). A separate Camera IP field also appears for PrusaLink models that stream from a different device.
- OctoPrint. Shows API Key. Generate one in OctoPrint at Settings > API and paste it here.
- Klipper / Moonraker, Duet, FlashForge. No credential needed for read access on a trusted LAN.
If the wrong field appears or no field appears, change the Firmware Type dropdown — the credential field is driven by that selection.
Expand Advanced for:
- Web UI port. Override the default (e.g. for a custom Klipper / Voron build that serves Mainsail on a non-default port).
- MAC Address. Auto-detected, read-only. Used to re-find the printer if its DHCP lease changes.
- Webcam Path. Override the default stream URL.
- Filament Slots. Defaults to 1, max 12 (for AMS).
- Maintenance Cycle (hours). Print-hours between maintenance reminders. 0 disables the reminder.
- Ports. The detected printer-control ports. Add or remove rows if you need to override.
The Ignored toggle at the bottom of the form adds the printer to the database but hides it from the dashboard. Useful for staging an entry you'll wire up later.
Click Add Printer to save. The form repeats for each remaining printer in your selection, with a counter (e.g. "Add Printer (2 of 4)") in the header.
Step 5. Verify on the dashboard
Dashboard
After the last printer is saved, you return to the dashboard. Each new printer appears as a row with its camera feed (if reachable), live status, an empty Active Job column, and the action buttons (Print, Home, Light On, Edit, etc.).