Connect Your Slicer (Draft)
PrinterMon exposes an OctoPrint-compatible upload API. Most slicers (PrusaSlicer, OrcaSlicer, SuperSlicer, Cura with the OctoPrint plugin) can send G-code straight to PrinterMon by pointing at this endpoint with the API key from your node.
Step 1. Get your API key
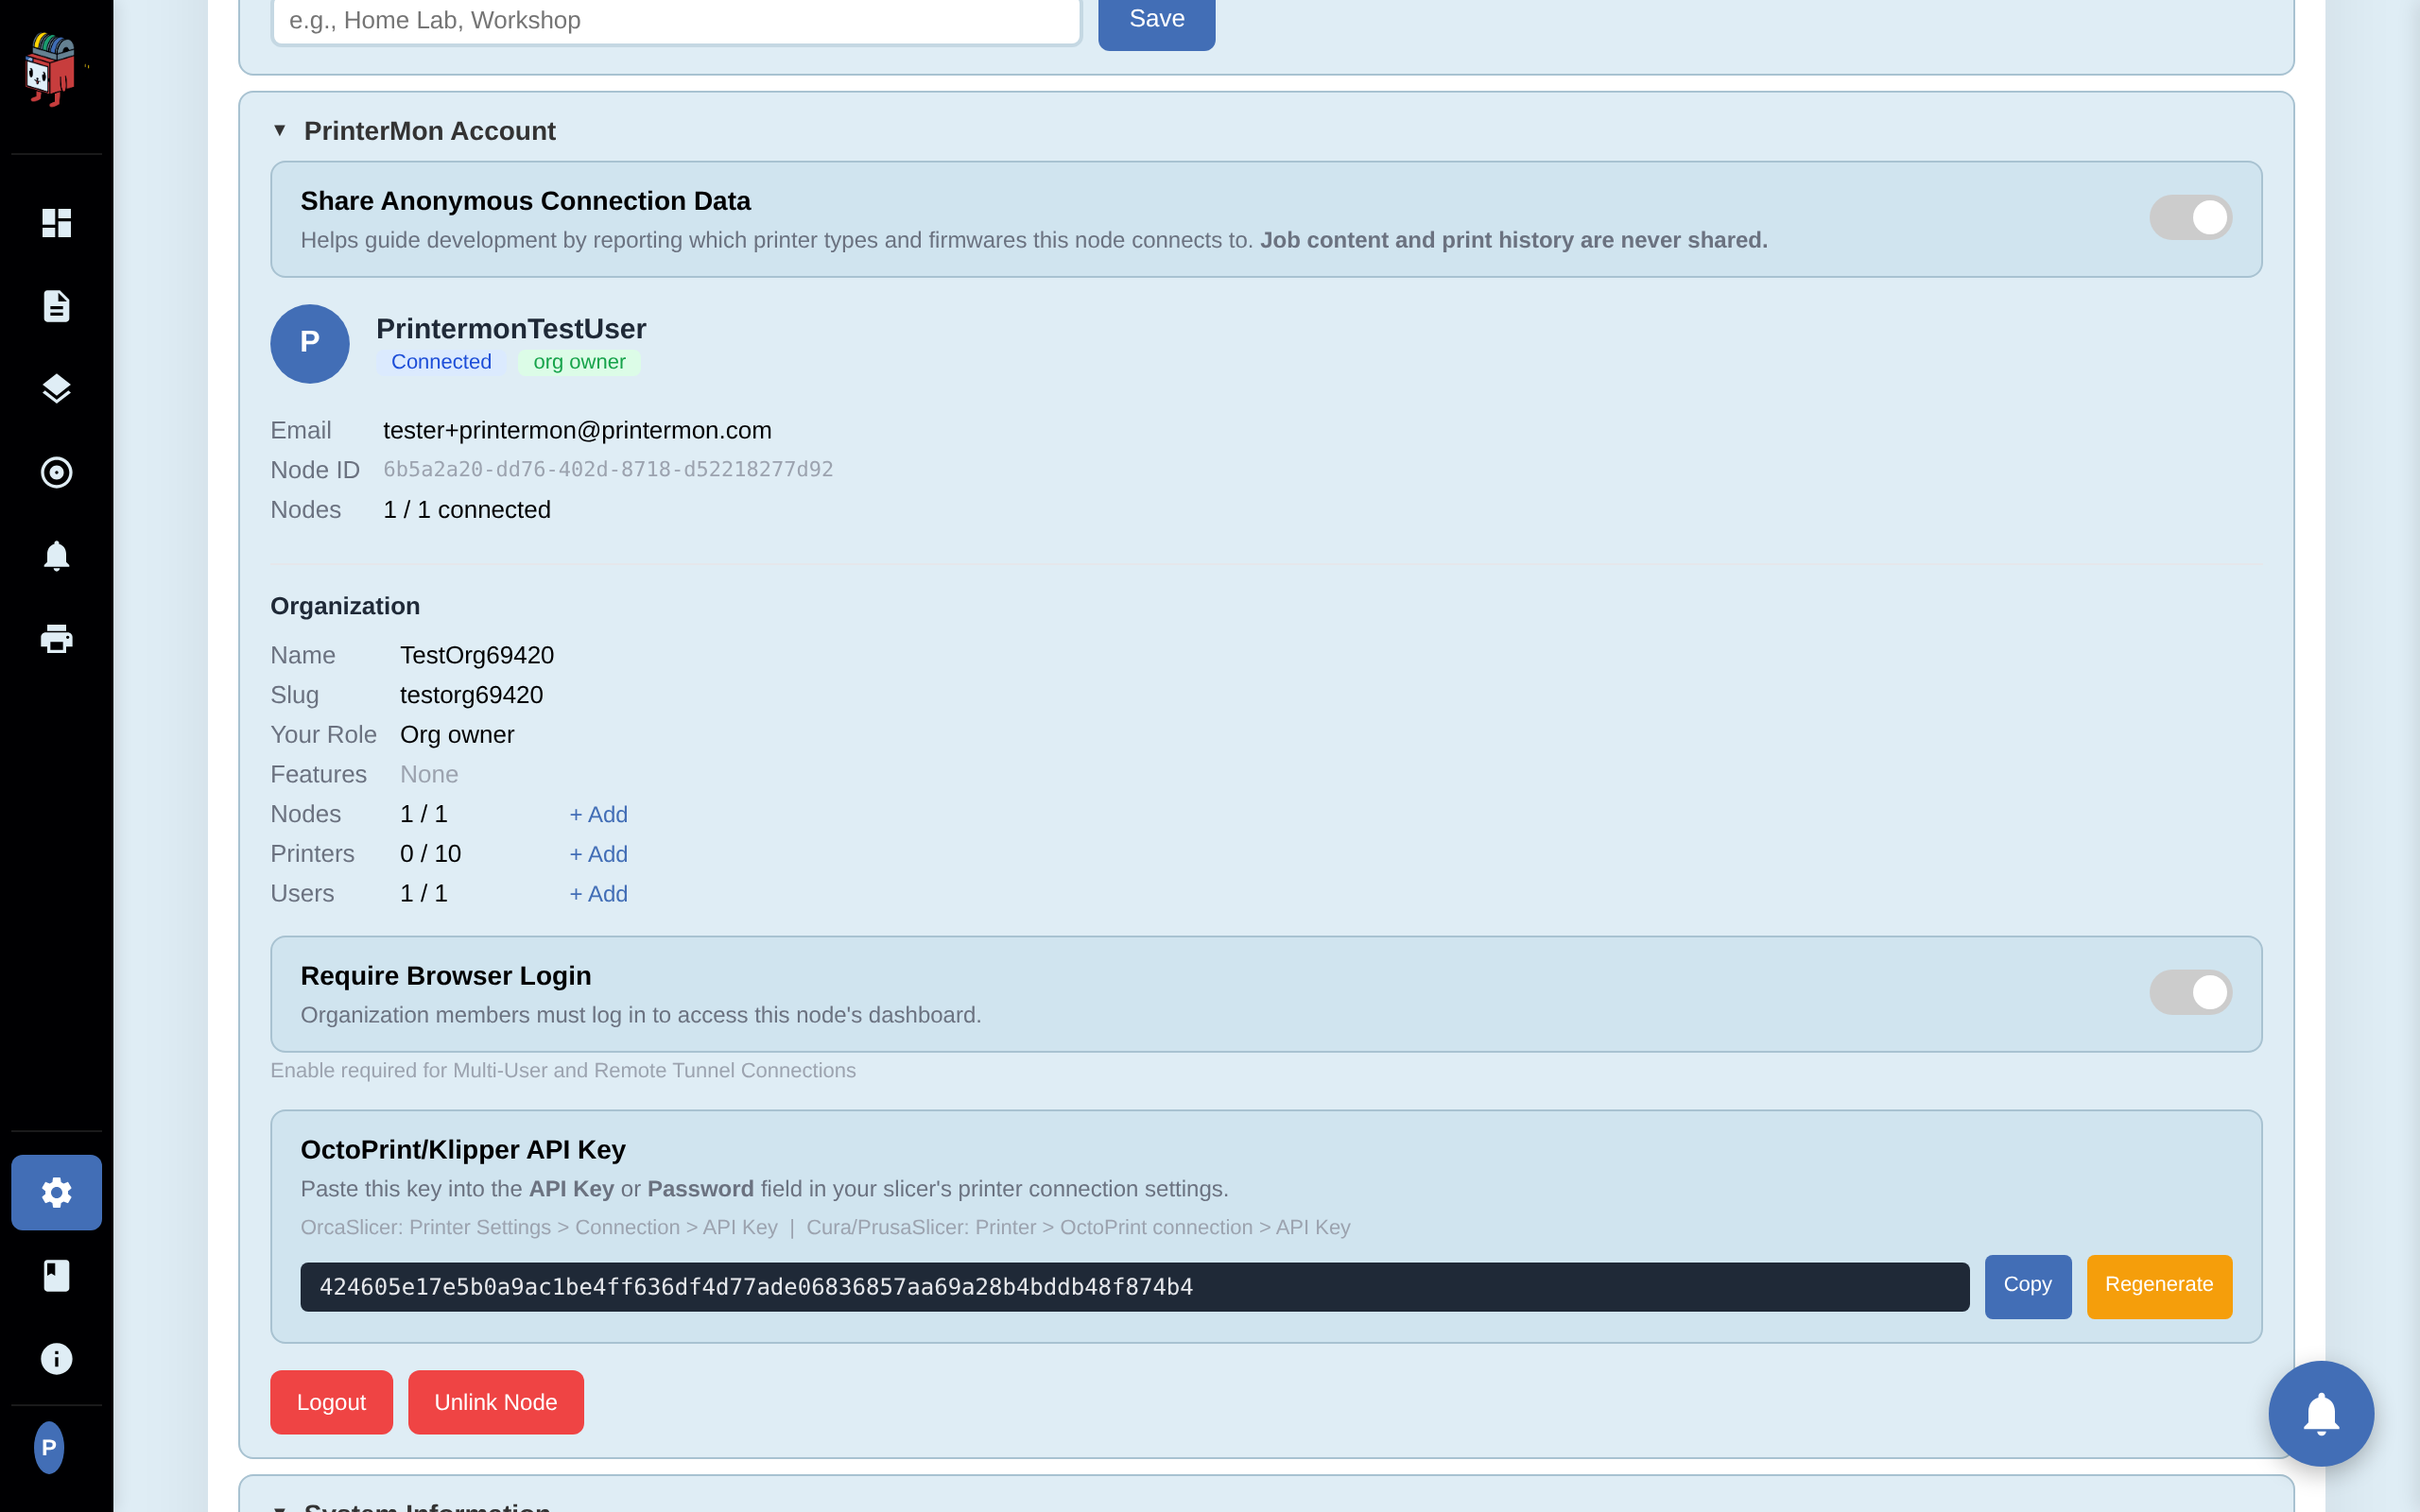
API Key
In the node's web UI, go to Settings and scroll to the OctoPrint / Klipper Slicer API Key panel. Copy the key. Treat it like a password. Anyone with this key can upload jobs to your node.
Step 2. Configure the slicer
In your slicer, add a new Physical Printer (PrusaSlicer / SuperSlicer) or printer connection (Cura, OrcaSlicer) and point it at PrinterMon.
- Host type: OctoPrint.
- Hostname: your node IP and port. Example: http://192.168.1.50:8888
- API Key: the value you copied above.
Save the connection and run the slicer's built-in test. A successful test confirms the slicer can reach PrinterMon.
Step 3. Send a print
Slice a model as usual, then use the slicer's Send to Printer (or Upload) action. The job arrives in PrinterMon and appears in the file library for the printer you targeted. From there you can start it manually, or use Upload and Print to start it immediately.
Troubleshooting
- Connection refused. Confirm the node is running and reachable from your slicer machine. Try opening http://<node-ip>:8888 in a browser on the same machine.
- 401 / Unauthorized. The API key is wrong or was rotated. Copy it again from the Slicer API Key panel.
- Upload succeeds but no printer is selected. In your slicer's OctoPrint settings, set the target printer name to match the printer in PrinterMon.