Starting a Print from the Dashboard (Draft)
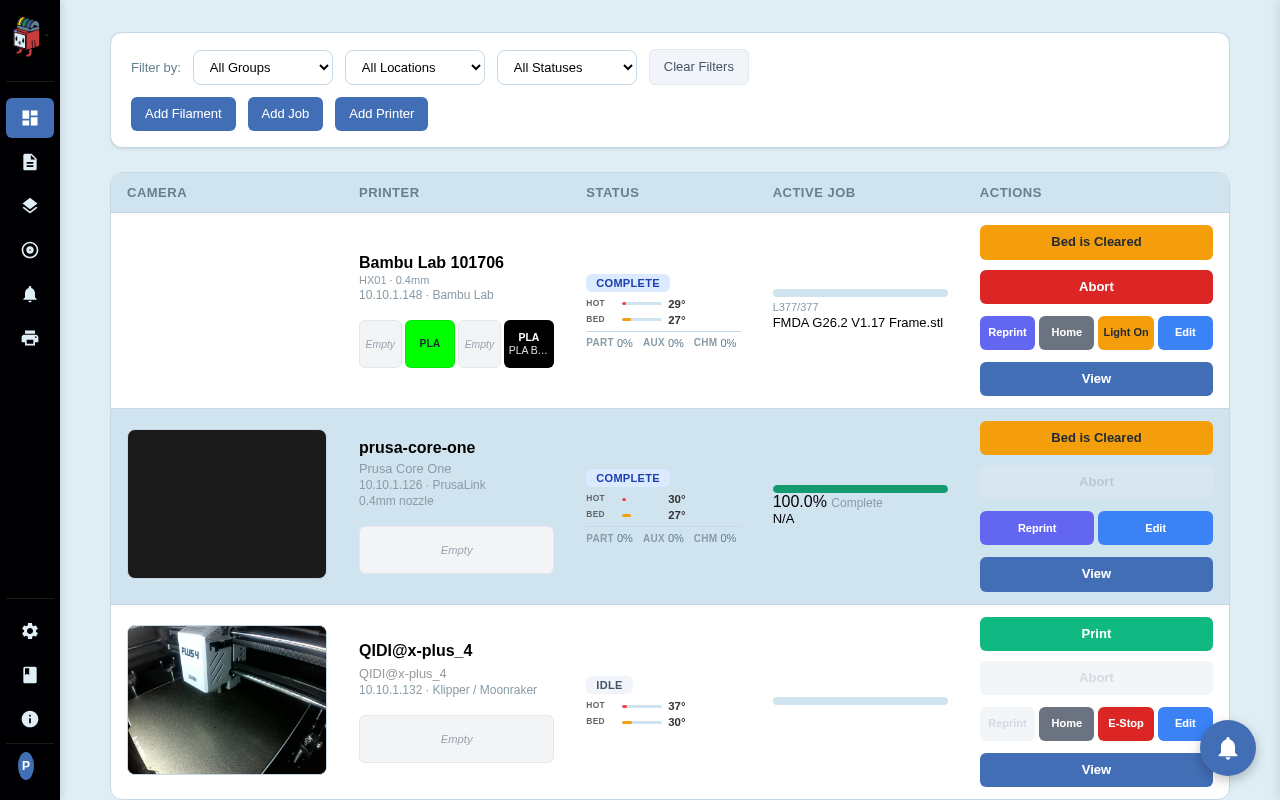
The dashboard is the home for everything PrinterMon knows about your printers. Each row shows the printer's camera, name and connection, current status, the active job and its progress, and a column of action buttons. Starting a print is a three-stage flow: pick a printer, attach a job, then click Print.
Step 1. Pick a printer
Dashboard
Open the dashboard. Find a printer that is ready to receive a job. The Status column should read IDLE (or COMPLETE with the bed already cleared). The Active Job column should be empty or show the last completed job. A green Print button in the Actions column means the printer is reachable and ready to start.
Step 2. Add a job and assign it to the printer
Upload Print File
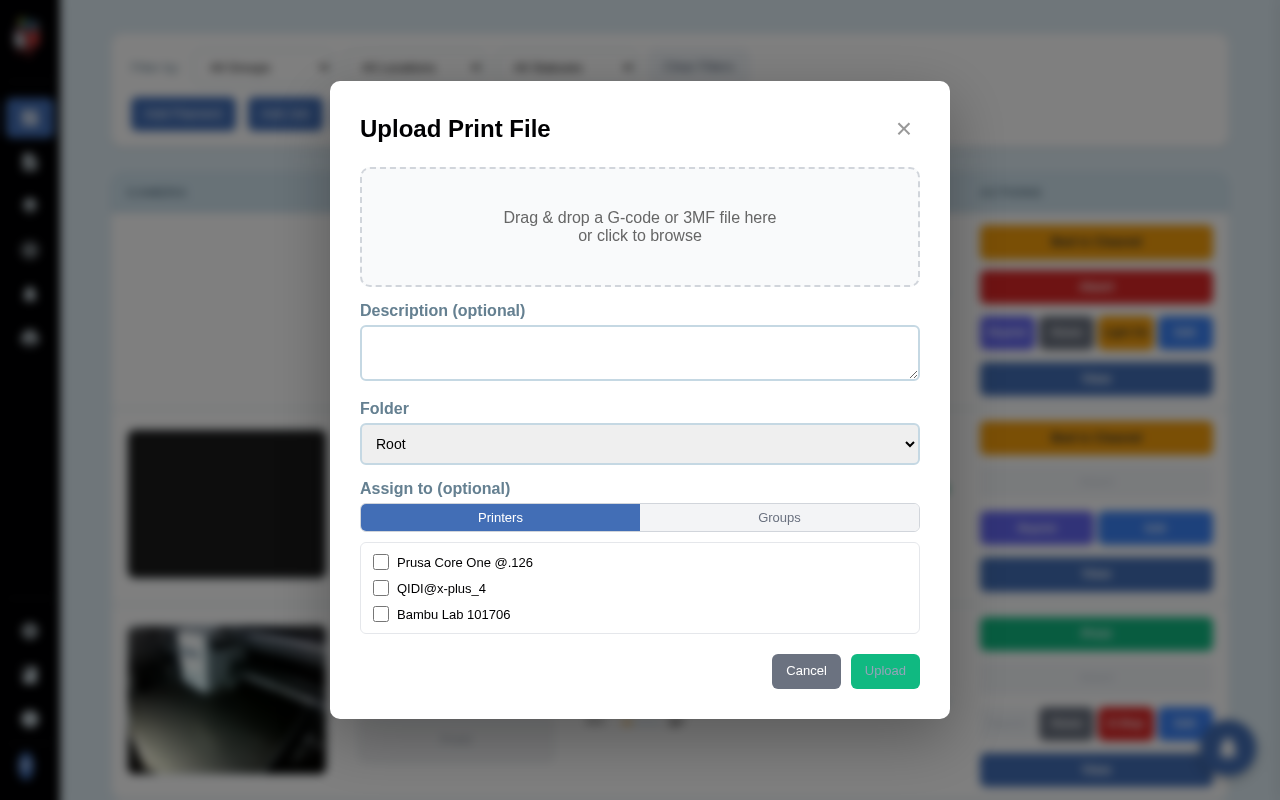
Click Add Job in the top toolbar. The Upload Print File dialog opens. Drop a .gcode, .g, .gco, or .3mf file into the drop zone (or click to browse). PrinterMon parses the file and shows a preview with the print time and filament estimate. In the Assign to section, tick the printer (or printers) that should receive this job, then click Upload. The file lands in your library and the chosen printer's row now shows the filename in the Active Job column.
Already have the file in your library from a previous upload or a slicer push? Open the file library, find the file, and use its Assign action to attach it to a printer without re-uploading. Either path ends with the same outcome: a Print button on the printer's row.
Step 3. Click Print and confirm
Confirm Print
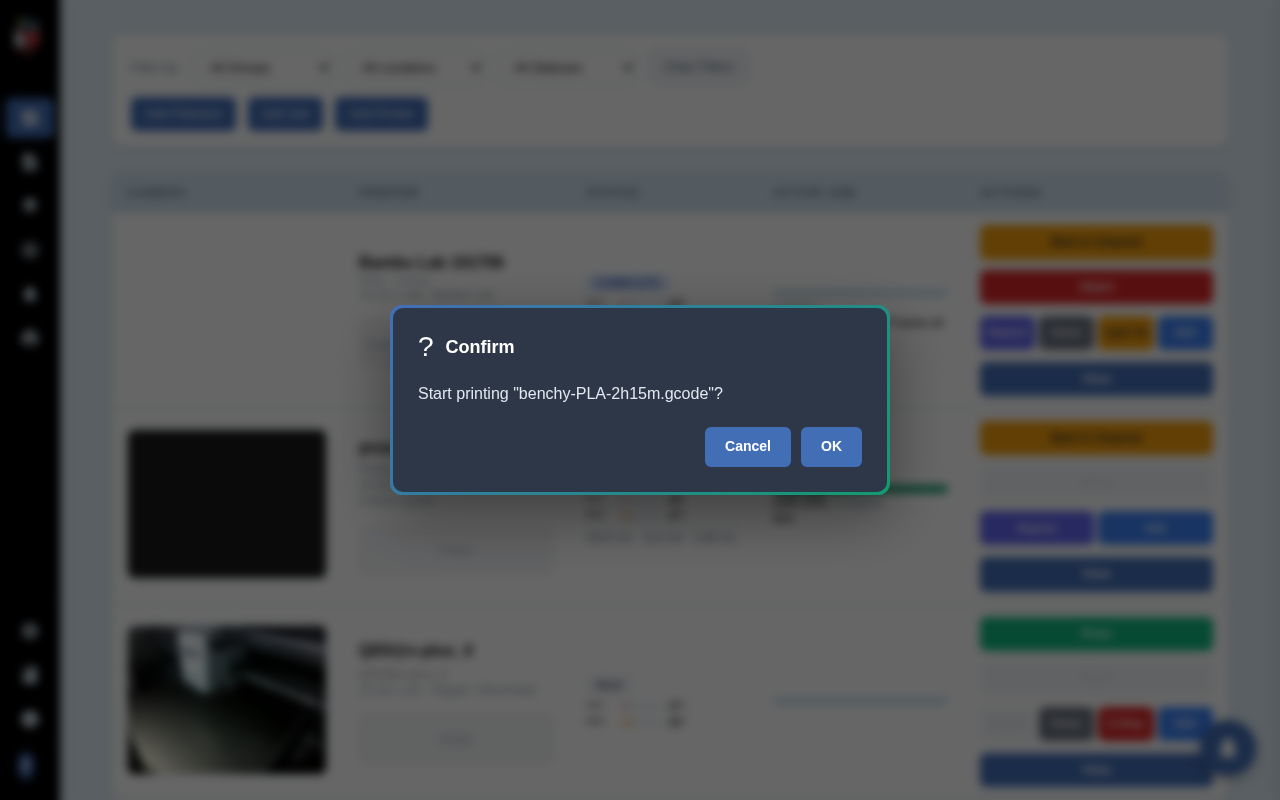
Click the green Print button on the printer's row. PrinterMon shows a Confirm dialog naming the file. Click OK to start the print, Cancel to back out. There is no second dialog. The next click sends the job.
Once you confirm, the row's Status changes to STARTING for a moment, then PRINTING. The Active Job column shows live progress as a percentage and the dashboard card arc fills clockwise as the job runs.
After the print finishes
When the print completes, the status changes to COMPLETE. The Bed is Cleared button replaces Print in the Actions column until you confirm the bed is empty. See the Bed is Cleared snippet for that flow.
If something goes wrong
- Print button is greyed out. The printer is not reachable, or it is already running a job, or it has no active job assigned. Check the Status column and the Active Job column.
- Confirm dialog appears, click OK, then nothing happens. Open the Logs tab in Settings. A failed start logs the error from the printer (firmware busy, bad G-code, missing filament, etc.).
- Wrong file gets started. The Print button uses whichever job is shown in the Active Job column. If you assigned the wrong file, edit the printer to swap it before clicking Print.